Creating an autoresponder via Webmail
Autoresponders are a handy tool to let people know you're out of the office. They're easy to configure too!
Autoresponders are easy to set up and allow you to set a start and/or end time, so you can configure them in advance.
Visit webmail.yourdomain.com, replacing yourdomain.com with your account's primary domain name.
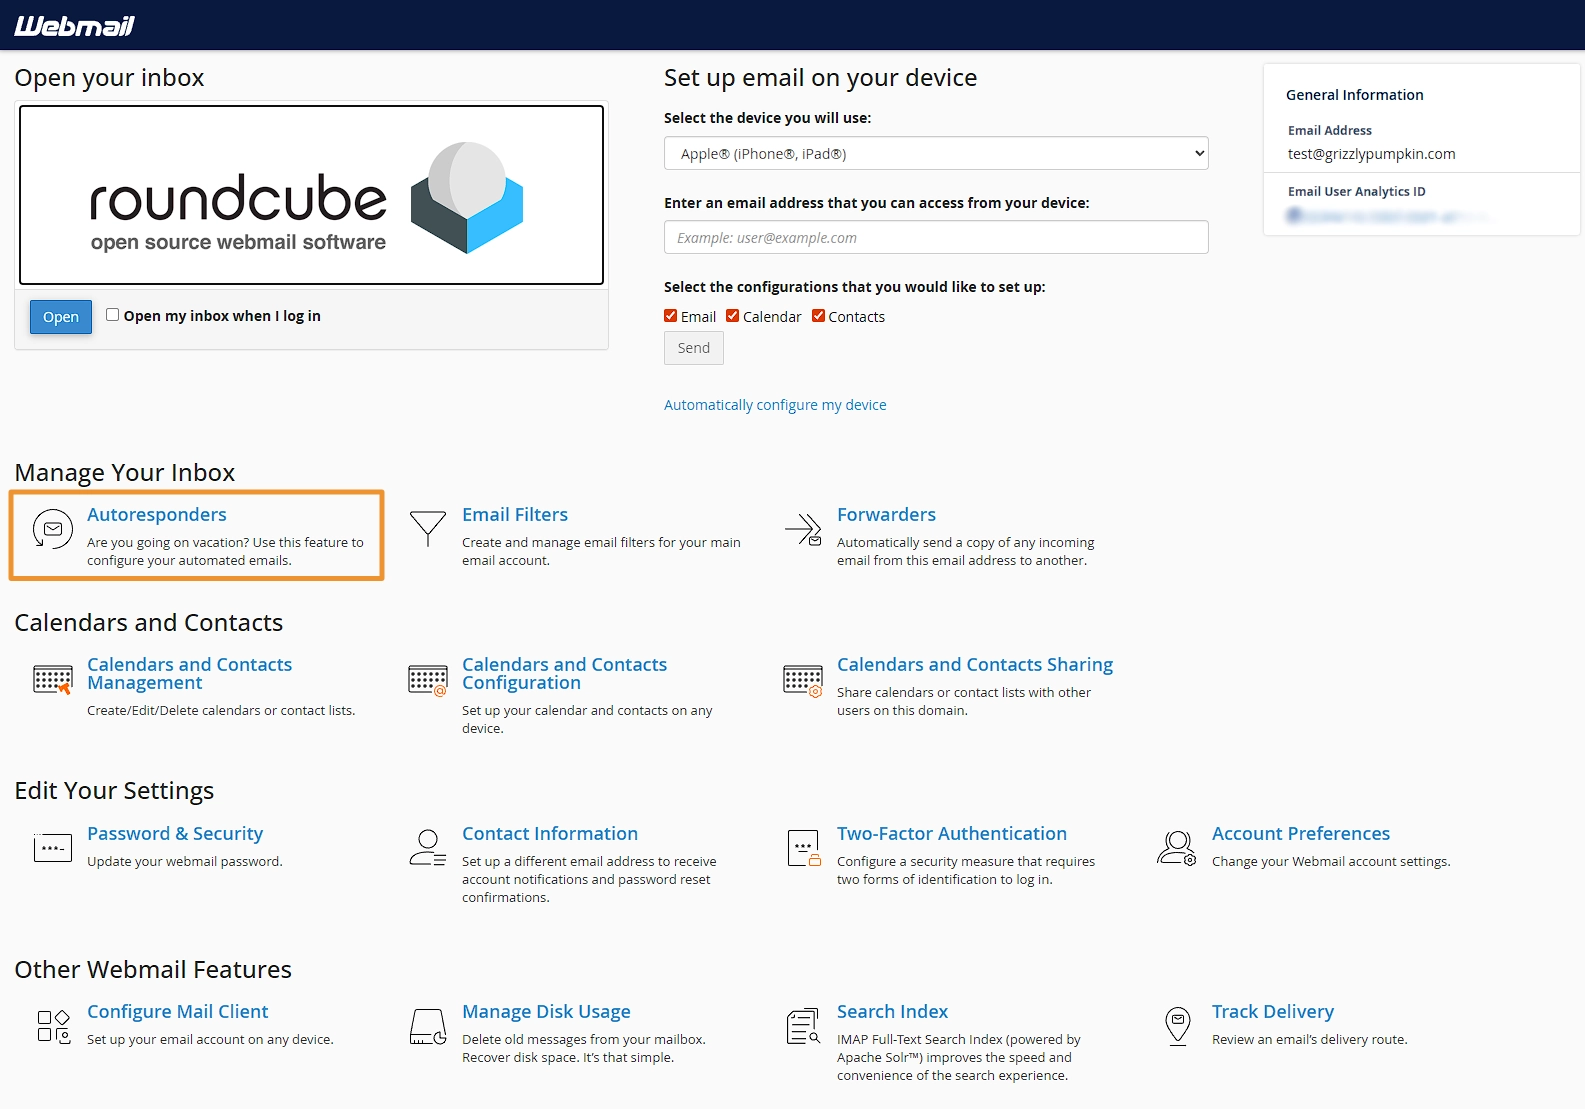
Once logged in, click the Autoresponders item on the portal. If you have been taken straight to your inbox, use the Webmail Home link in the left menu first.
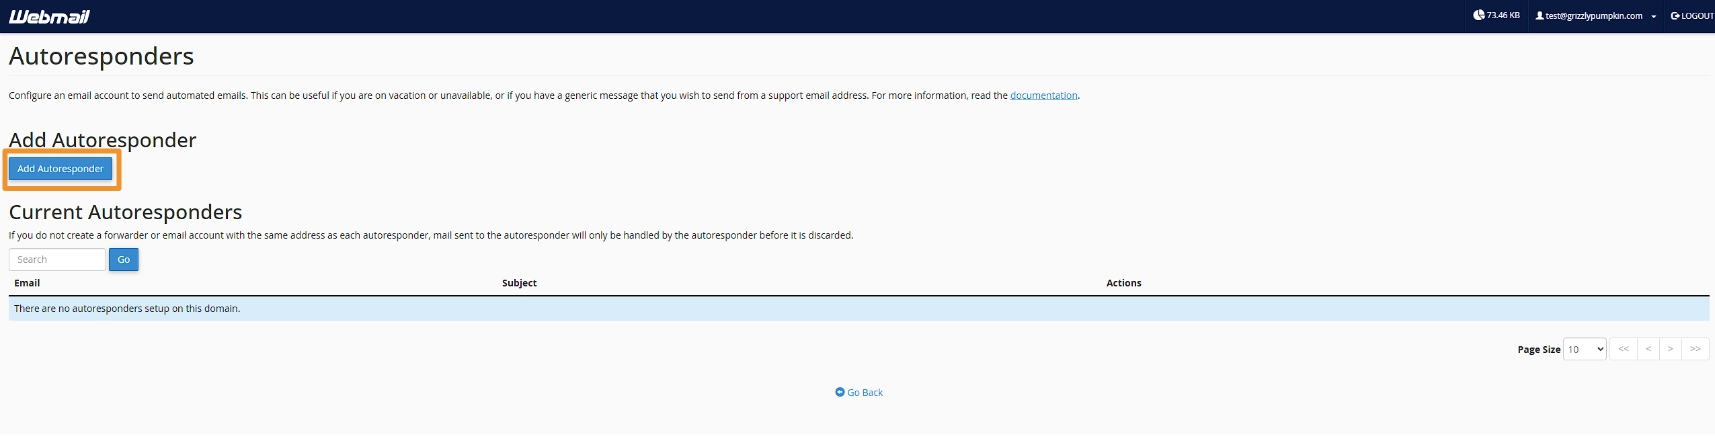
You will then be shown a list of autoresponders currently configured. From here you can edit or delete them. To create a new one click Add Autoresponder.
From here, you'll be shown the configuration form for your autoresponder.
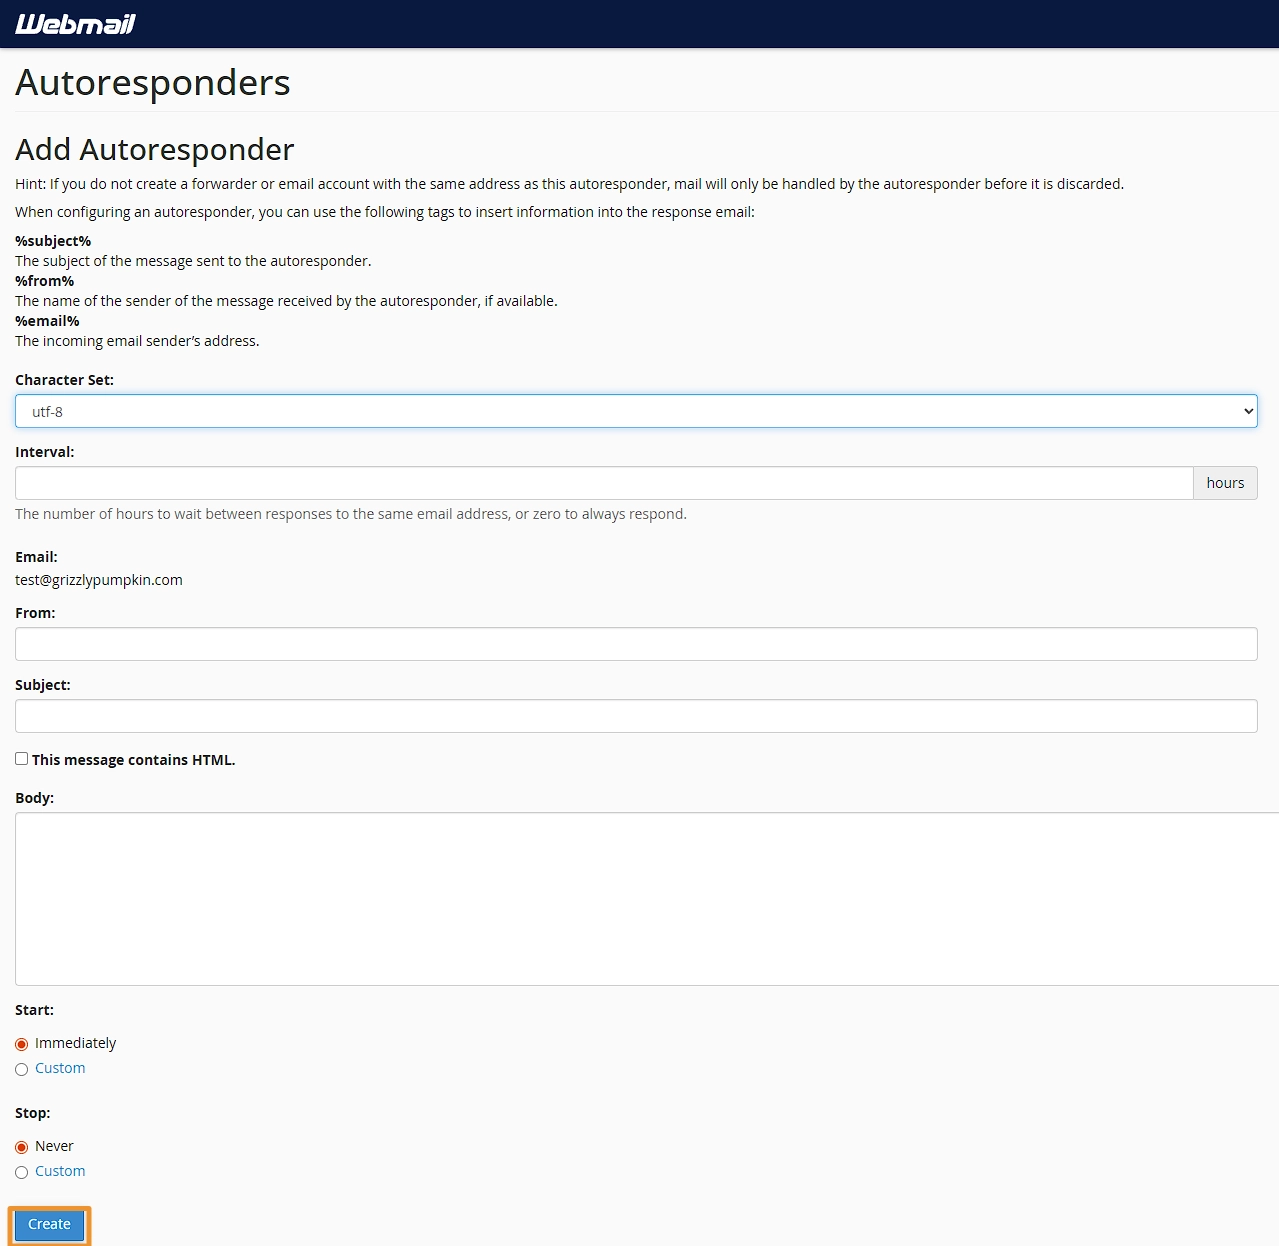
Character Set - this can generally be left as default
Interval - this is the amount of time between responses. If the same sender sends another email within this interval, they won't receive another automatic response. Set this to 0 to always send a response.
From - this allows you to set a custom sender name. We recommend setting this to your email address.
Subject - this is the subject of the email that will be sent. You can use one of the variables to pre-populate this. A common example is Autoresponse: %subject%
This message contains HTML - if your message contains HTML for new lines, signatures, and similar formatting, make sure this is toggled on.
Body - enter the message that will be returned to the user. You can use the available variables here as well. If the HTML toggle above is enabled, you can also enter HTML to format the email in a specific way.
Start - this allows you to set the autoresponder to be enabled immediately, or at a scheduled date and time.
End - this allows you to set the autoresponder to never end, or end at a given date and time.
Once you've completed the form click Create.
The autoresponder is now configured and will respond to emails you receive between the Start and End dates.
Related Articles
Setting up an email forwarder
Our hosting supports mailbox-level and domain-level email forwarders. Here is how to configure them.
Accessing your webmail
All of our shared hosting packages come with a feature-rich Webmail portal. Here is how to access it.
Changing your Webmail password
It is good practice to occasionally change your webmail password. It is easy to do via the Webmail portal.