Setting up and using cPanel teams
cPanel has a teams feature, which is available on all of our plans. This features allows you invite other users to your hosting account while limiting the access they have.
cPanel's Teams feature provides a way for you to configure multiple cPanel users that can access your hosting account. You can also restrict the access they have to certain parts of the account. Providing a robust, and flexible way to allow different users to manage certain aspects of your account.
The teams feature is enabled on all of our plans.
Creating and Editing Users
First, access your cPanel account by visiting cpanel.yourdomain.com or yourdomain.com/cpanel. Replacing yourdomain.com with your account's primary domain name.
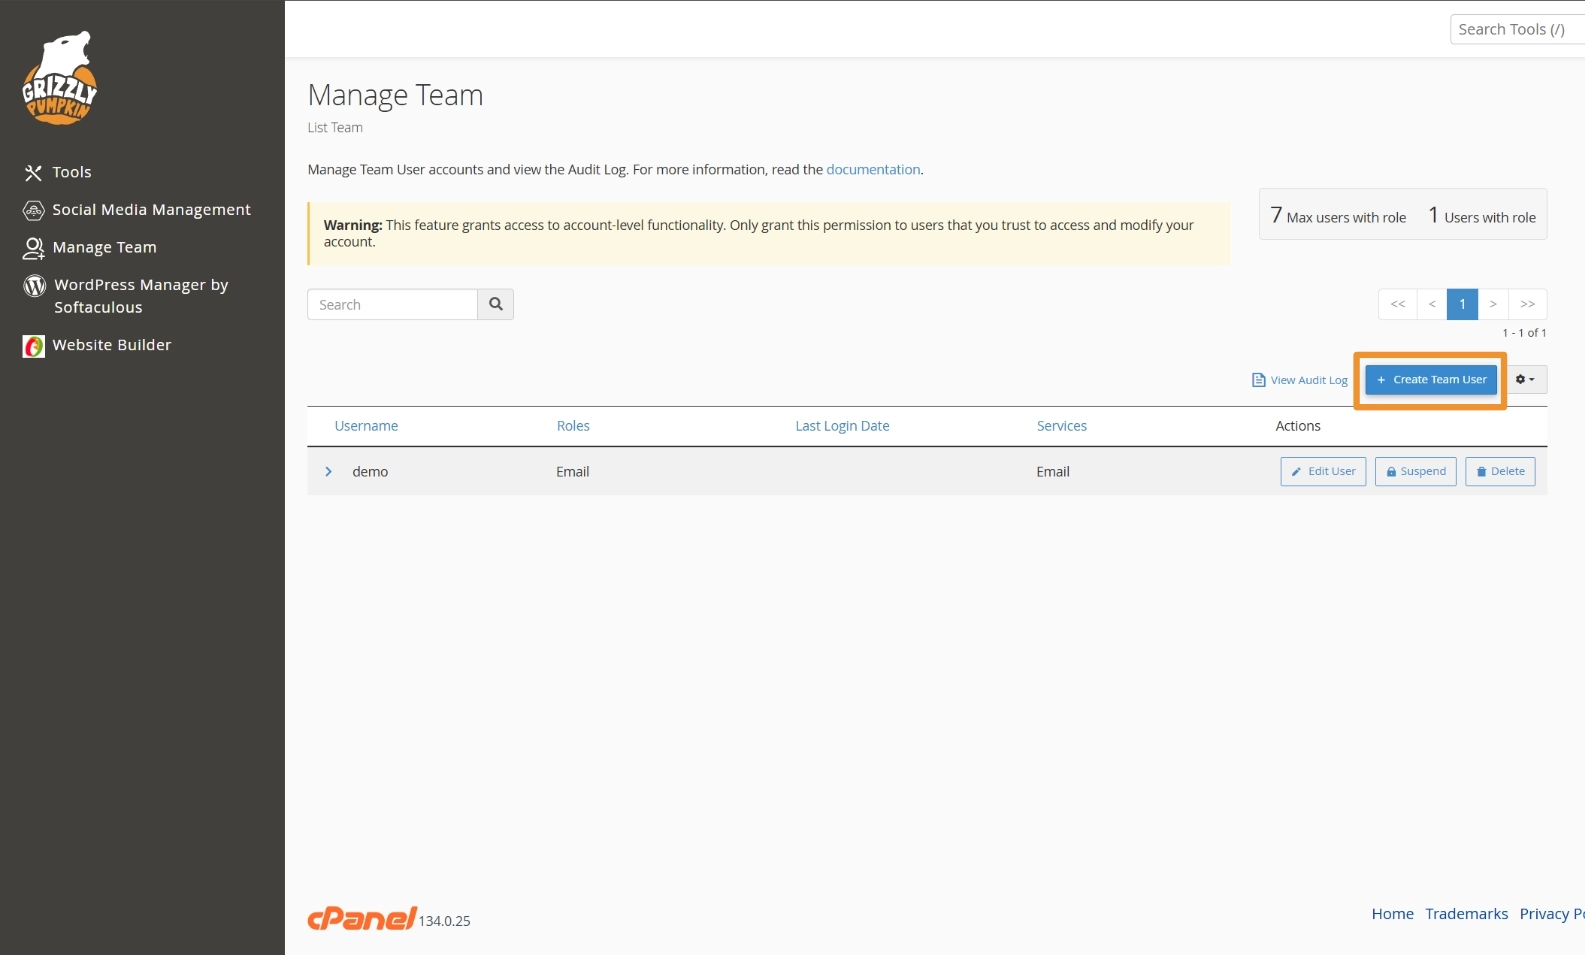
Once logged in, click Manage Team under Preferences, this is usually towards the bottom of the page on most accounts. You may also have a Manage Team link in the left menu which can be used as a quick shortcut.
From here you'll be able to see the current team members that have access to your hosting account. You can add a new user by clicking Create Team User.
This will take you to a page where you can enter the details for the user, once complete, click Create.
Username - This, alongside the password, is what the user will use to login. Please note, that the username will also include @yourdomain.com similar to an email address, however, it does not matter if a mailbox does or does not exist.
Password - choose Set the user's password option and then generate a random password, make sure to copy this prior to saving. The user will set the account password is not supported on our servers as the cPanel password reset flow, which this option relies on, is disabled for security reasons.
Contact Email - This is the email that the user can be contacted on, they may receive system notifications to this email.
Roles - This is where you can optionally restrict the user to certain feature groups of your account. To see what features each role will allow click the Show Features link.
Notes - Optional notes for you to provide some additional context around the user.
Services - This is where you can also have the system automatically configure this user for email, FTP, and/or Web Disk features. If selected the user will be enabled and configured for those services too.
Security Settings - If you only want to grant a user temporary access, you can configure an expiry date and reason within this section.
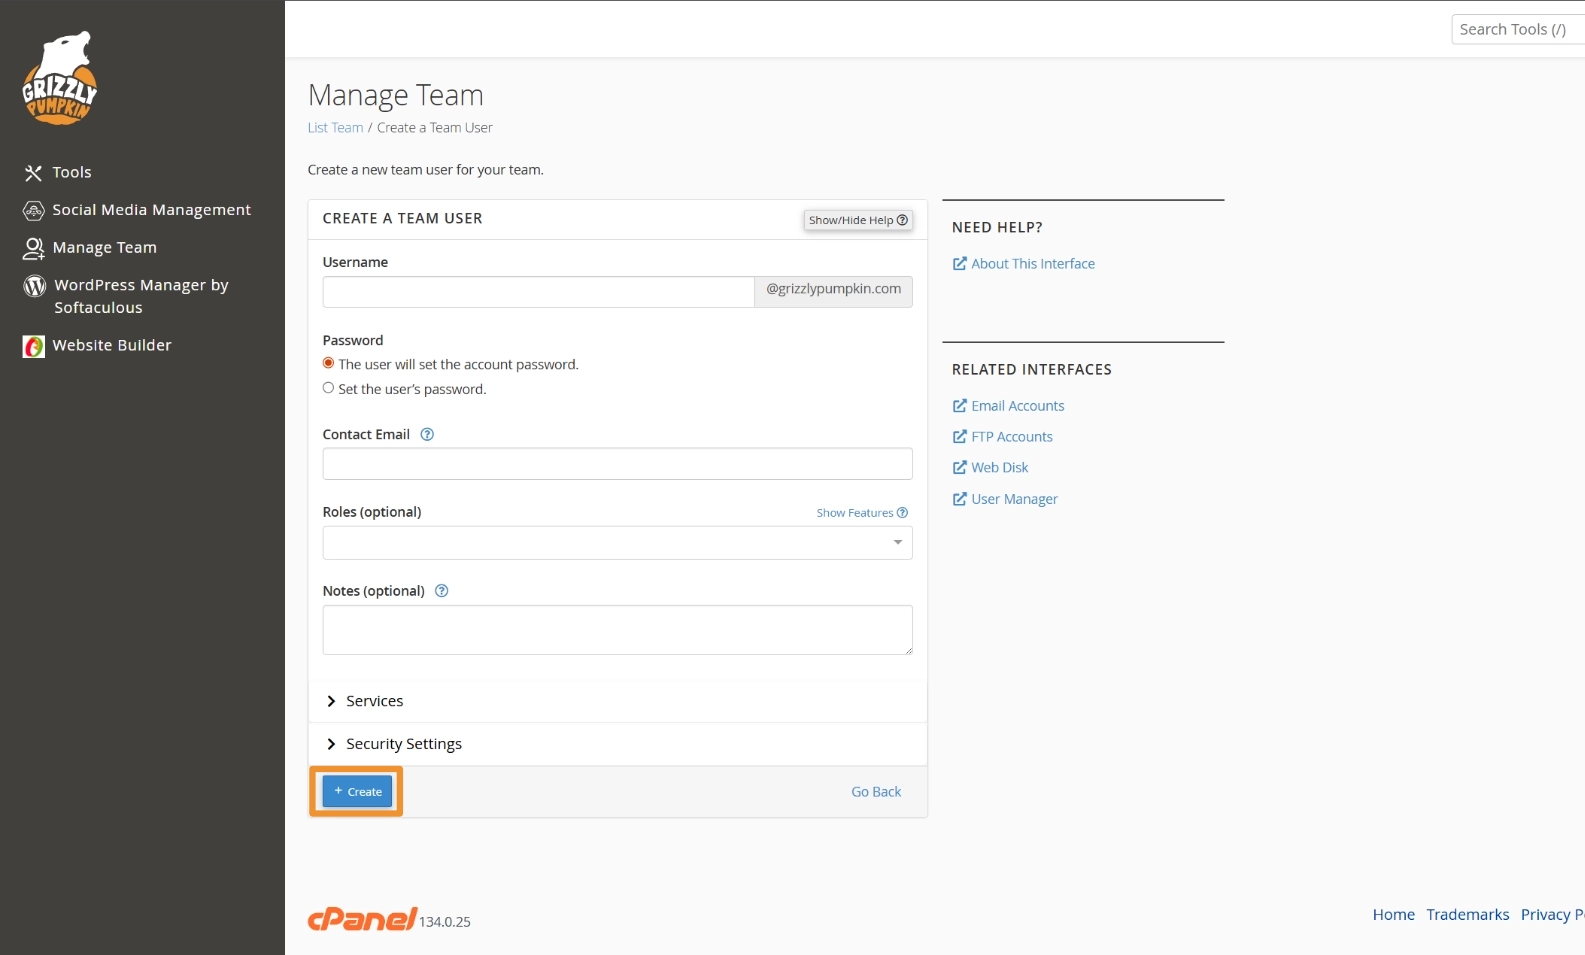
Once created this will take you back to the user list.
You can edit the user by clicking Edit User this will take you to the same form as step 4.
Suspending and Unsuspending Users
Suspending a user will prevent them from being able to login, without deleting their user, allowing you to unsuspend them at a later date.
First, access your cPanel account by visiting cpanel.yourdomain.com or yourdomain.com/cpanel. Replacing yourdomain.com with your account's primary domain name.
Once logged in, click Manage Team under Preferences, this is usually towards the bottom of the page on most accounts. You may also have a Manage Team link in the left menu which can be used as a quick shortcut.
From here you'll be able to see the current team members that have access to your hosting account. The Suspend or Unsuspend (if already suspended) actions next to a user record can be used to change the user's suspension status.
Deleting Users
Deleting a user will delete all of their account data and any related services they have configured, including data associated with those services.
First, access your cPanel account by visiting cpanel.yourdomain.com or yourdomain.com/cpanel. Replacing yourdomain.com with your account's primary domain name.
Once logged in, click Manage Team under Preferences, this is usually towards the bottom of the page on most accounts. You may also have a Manage Team link in the left menu which can be used as a quick shortcut.
From here you'll be able to see the current team members that have access to your hosting account. Use the Delete action next to the user record. This will open a confirmation, if the details are correct you can then click Delete.
Related Articles

Adding a new email mailbox in cPanel
Adding and managing your email mailboxes is important as your business grows. It's straightforward in cPanel.

Changing your cPanel password
Changing your cPanel password is easy and can be completed in a couple of steps.