Adding a new email mailbox in cPanel
Adding and managing your email mailboxes is important as your business grows. It's straightforward in cPanel.
Adding a new mailbox to your cPanel hosting account is straightforward and only takes a few minutes. Once it is set up, your users can access it via Webmail or by using the IMAP/POP settings in their preferred email client.
First, start by logging in to your control panel. This is typically available via cpanel.yourdomain.com, replacing yourdomain.com with your account's primary domain name.
Once logged in, find the Email -> Email Accounts link. This is usually near the top, although it may be further down depending on your account's setup.
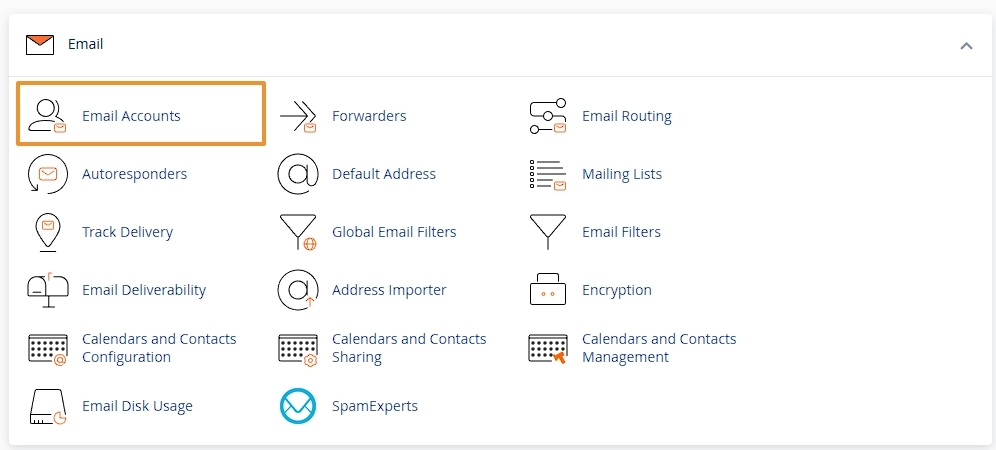
This will show a list of the email accounts currently configured. You'll always have one tagged as "System"; this can be ignored, as it is used by the control panel as a catch-all. From here, you can click the Create button to the right of the list of emails.

This will then provide the email creation form. Clicking Edit Settings next to Optional Settings will also provide some additional options:
Domain this is the domain you'd like to create the email account against. If your account only has one domain, then this will only have one option. This would allow you to change the domain after the @
Username this is the value before the @
Password this is the password for the account. It can be changed later, and the user can also change it via Webmail. Make sure this is a secure password, or use the Generate button to have a secure password automatically generated.
Storage Space this is the amount of space allocated to the email account. Note that your hosting account's storage quota does still apply. If you have a user you'd like to restrict their storage then you can enter it here, otherwise, you can set this to Unlimited.
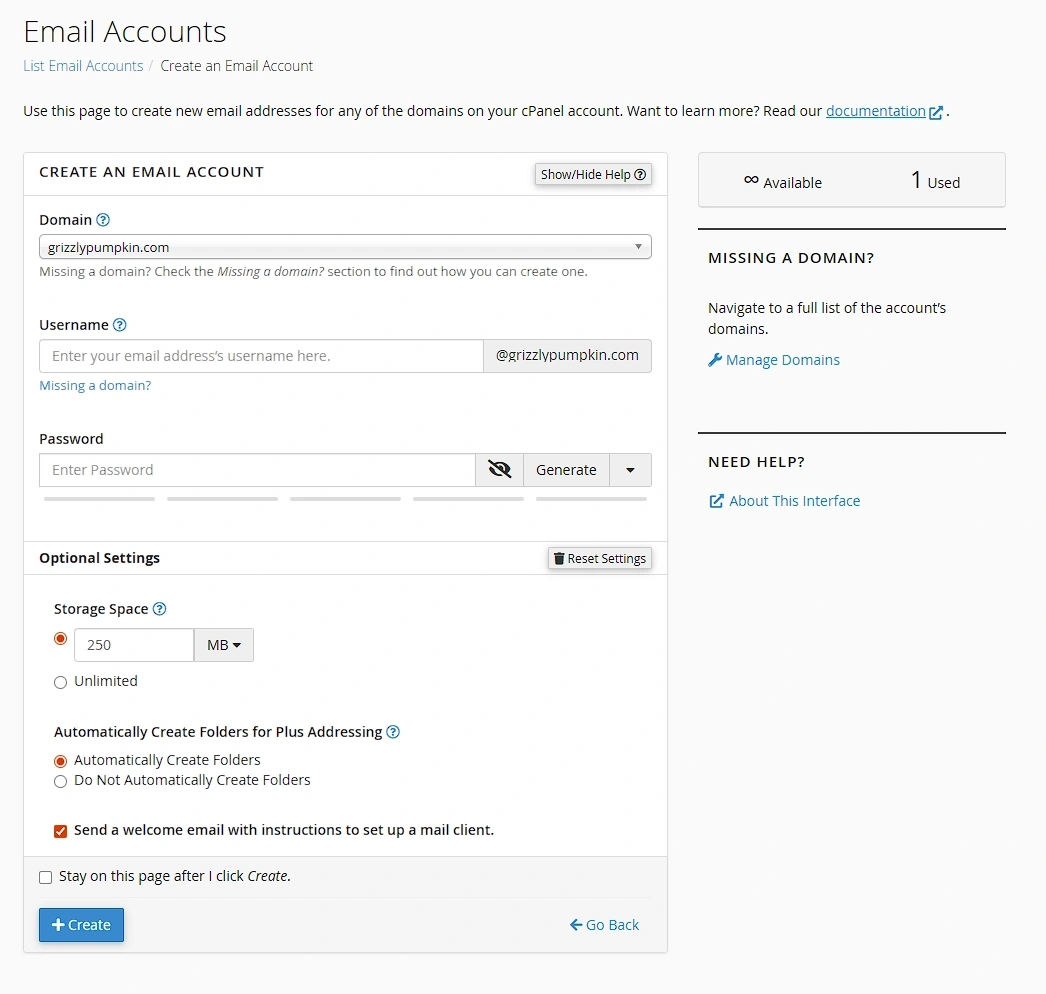
Enter the relevant details and then click Create at the end of the form.
This will take you back to the Email Accounts list from step 3. That's it, the email account is now created and can be accessed via Webmail, or through an email client using IMAP or POP3.
Related Articles

Resetting a mailbox password
Forgetting a password happens to everyone, however, a user with cPanel access can quickly reset webmail password access for an email mailbox.

Accessing your webmail
All of our shared hosting packages come with a feature-rich Webmail portal. Here is how to access it.
Access your email on your phone or another email client
Configuration to access your email from your phone or another email client.